Donnerstag, 12. September 2013

Three.js - Particle Engine III (Fire and Sphere)

Part III of the particle engine breaks down the sphere type and fire.

Fireball

 //fireball
    var settings = {
      positionStyle  : Type.SPHERE,
      positionBase   : new THREE.Vector3( 0, 0, 1 ),
      positionRadius : 0.5,
        
      velocityStyle : Type.SPHERE,
      speedBase     : 1,
      speedSpread   : 0,
      
      particleTexture : THREE.ImageUtils.loadTexture( 'images/smokeparticle.png' ),

      sizeTween    : new Tween( [0,4], [0,10] ),
      opacityTween : new Tween( [0, 0.3], [1, 1] ),
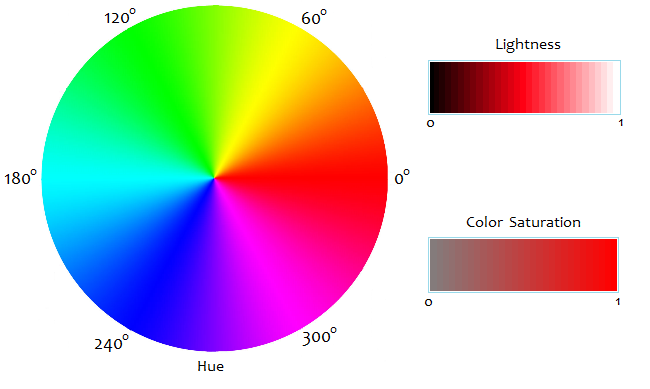
      colorBase    : new THREE.Vector3(0.02, 1, 0.4),
      blendStyle   : THREE.AdditiveBlending,  
      
      particlesPerSecond : 5000,
      particleDeathAge   : 0.7,  
      emitterDeathAge    : 60
     };

The particles are now moving from a center to the outside of a sphere.
      positionStyle  : Type.SPHERE,
      positionBase   : new THREE.Vector3( 0, 0, 1 ),
      positionRadius : 0.5,

The movement is done by these lines:
      velocityStyle : Type.SPHERE,
      speedBase     : 1,
      speedSpread   : 0,

The brigthness effect is done by:
blendStyle   : THREE.AdditiveBlending, 


Collect Energie

You can change the direction and make a "collect energie" effect.
  //energie
    var settings = {
      positionStyle  : Type.SPHERE,
      positionBase   : new THREE.Vector3( 0, 0, 1 ),
      positionRadius : 7,
        
      velocityStyle  : Type.SPHERE,
         speedBase     : -8,
         speedSpread   : 0,
      
      particleTexture : THREE.ImageUtils.loadTexture( 'images/smokeparticle.png' ),

      sizeTween    : new Tween( [0], [1] ),
      opacityTween : new Tween( [0, 4], [1, 0] ),
      colorTween   : new Tween( [0.2, 1], [ new THREE.Vector3(0.52, 1, 0.5), new THREE.Vector3(0.05, 1, 0.5) ] ),
      blendStyle   : THREE.AdditiveBlending,  
      
      particlesPerSecond : 300,
      particleDeathAge   : 1,  
      emitterDeathAge    : 60
     };


Smoke Bomb


  //smoke bomb
    var settings = {
      positionStyle  : Type.SPHERE,
      positionBase   : new THREE.Vector3( 0, 0, 1 ),
      positionRadius : 1,
        
      velocityStyle  : Type.SPHERE,
         speedBase     : 2,
         speedSpread   : 4,
      
      particleTexture : THREE.ImageUtils.loadTexture( 'images/smokeparticle.png' ),

      sizeTween    : new Tween( [0,4], [5,10] ),
      opacityTween : new Tween( [0, 5], [0.6, 0.3] ),
      colorTween   : new Tween( [0.2, 1], [ new THREE.Vector3(0.0, 0, 1), new THREE.Vector3(0.05, 0, 0.5) ] ),
      
      particlesPerSecond : 100,
      particleDeathAge   : 4,  
      emitterDeathAge    : 60
     };


Full script

<html>
<html>
 <head>
  <script src="three/build/three.min.js"></script>
  <script src="three/examples/js/controls/OrbitControls.js"></script>
  <script src="three/ParticleEngine.js"></script>
  <script src="jquery-1.10.2.min.js"></script>
    
  <script type="text/javascript">
     
   $(function() {
   
    //scene
    scene = new THREE.Scene();
    //camera
    var camera = new THREE.PerspectiveCamera( 45, window.innerWidth / window.innerHeight, 0.1, 1000 );
    camera.position.set(0,-13,5);
    camera.lookAt(new THREE.Vector3( 0, 5, 0 ));
    
    //renderer
    var renderer = new THREE.WebGLRenderer();
    renderer.setSize( window.innerWidth, window.innerHeight );

    //controls
    var controls = new THREE.OrbitControls( camera, renderer.domElement );
      
    //show canvas
    $("#canvas-container").html(renderer.domElement);
    
    
 //directional light
 var directionalLight = new THREE.DirectionalLight(0xffffff);
 directionalLight.position.set(6, 0, 6);
 scene.add(directionalLight);
 
 //sphere
 //SphereGeometry(RADIUS,SEGMENTWIDTH,SEGMENTHEIGHT)
 var geometry = new THREE.SphereGeometry(3, 10, 10);
 var material = new THREE.MeshBasicMaterial({wireframe: true,color: 0x555555});
 var sphere = new THREE.Mesh( geometry, material );
 sphere.position.set(0,0,1);
 scene.add( sphere );
    
    
    //grid xy
    var gridXY = new THREE.GridHelper(10, 1);
    gridXY.rotation.x = Math.PI/2;
    scene.add(gridXY);


 //particle
    //smoke bomb
    var settings = {
      positionStyle  : Type.SPHERE,
      positionBase   : new THREE.Vector3( 0, 0, 1 ),
      positionRadius : 1,
        
      velocityStyle  : Type.SPHERE,
         speedBase     : 2,
         speedSpread   : 4,
      
      particleTexture : THREE.ImageUtils.loadTexture( 'images/smokeparticle.png' ),

      sizeTween    : new Tween( [0,4], [5,10] ),
      opacityTween : new Tween( [0, 5], [0.6, 0.3] ),
      colorTween   : new Tween( [0.2, 1], [ new THREE.Vector3(0.0, 0, 1), new THREE.Vector3(0.05, 0, 0.5) ] ),
      
      particlesPerSecond : 100,
      particleDeathAge   : 4,  
      emitterDeathAge    : 60
     };
    
    engine = new ParticleEngine();
 engine.setValues( settings );
 engine.initialize();


    //render scene
    var render = function () {
     requestAnimationFrame(render);
     renderer.render(scene, camera);
     
     engine.update( 0.01 * 0.5 );
    };
      
    render();


   });
     
  </script>
    
 </head>
 <body style="background: black">
    
  <div id="canvas-container" style="position: absolute; left:0px; top:0px"></div>
    
 </body>
</html>

Three.js - Particle Engine II (Stream and Smoke)

After bringing the particle engine to life, here are some examples.

Startunnel

//startunnel
    var settings = {
      positionStyle  : Type.CUBE,
      positionBase   : new THREE.Vector3( 0, 0, 2 ),
      positionSpread : new THREE.Vector3( 0.1, 0.1, 0.1 ),

      velocityStyle  : Type.CUBE,
      velocityBase   : new THREE.Vector3( 10, 0, 0 ),
      velocitySpread : new THREE.Vector3( 5, 5, 5 ), 
      
      particleTexture : THREE.ImageUtils.loadTexture( 'images/spikey.png' ),

      sizeBase    : 2.0,
      sizeSpread  : 1.0,    
      colorBase   : new THREE.Vector3(0.05, 1.0, 0.8), // H,S,L
      colorSpread : new THREE.Vector3(0.1, 0.0, 0.3),
      opacityBase : 1,
      blendStyle  : THREE.AdditiveBlending,

      particlesPerSecond : 500,
      particleDeathAge   : 4.0,  
      emitterDeathAge    : 60
     };

Pillar


 //pillar
    var settings = {
      positionStyle  : Type.CUBE,
      positionBase   : new THREE.Vector3( 0, 0, 0 ),
      positionSpread : new THREE.Vector3( 2, 2, 2 ),

      velocityStyle  : Type.CUBE,
      velocityBase   : new THREE.Vector3( 0, 0, 10 ),
      velocitySpread : new THREE.Vector3( 0, 0, 0 ), 
      
      particleTexture : THREE.ImageUtils.loadTexture( 'images/beam2.png' ),

      sizeBase    : 1.0,
      sizeSpread  : 0.2,    
      colorBase   : new THREE.Vector3(0.55, 1.0, 0.5), // H,S,L
      colorSpread : new THREE.Vector3(0.0, 0.0, 0.1),
      opacityBase : 1,
      blendStyle  : THREE.AdditiveBlending,

      particlesPerSecond : 1000,
      particleDeathAge   : 2,  
      emitterDeathAge    : 60
     };

Smoke


    //smoke
    var settings = {
      positionStyle    : Type.CUBE,
      positionBase     : new THREE.Vector3( 0, 0, 0 ),
      positionSpread   : new THREE.Vector3( 0, 0, 0 ),

      velocityStyle    : Type.CUBE,
      velocityBase     : new THREE.Vector3( 0, 0, 5 ),
      velocitySpread   : new THREE.Vector3( 2, 2, 0 ), 
      accelerationBase : new THREE.Vector3( 0,0,-1 ),
      
      particleTexture : THREE.ImageUtils.loadTexture( 'images/smokeparticle.png'),

      angleBase               : 0,
      angleSpread             : 720,
      angleVelocityBase       : 0,
      angleVelocitySpread     : 1000,
      
      sizeTween    : new Tween( [0, 1], [2, 8] ),
      opacityTween : new Tween( [0.8, 2], [0.5, 0] ),
      colorTween   : new Tween( [0.4, 1], [ new THREE.Vector3(0,0,0.2), new THREE.Vector3(0, 0, 0.5) ] ),

      particlesPerSecond : 50,
      particleDeathAge   : 2.0,  
      emitterDeathAge    : 60
     };

Let's have a look at the new atributes.

Tween
 sizeTween    : new Tween( [0, 1], [2, 8] ),
 opacityTween : new Tween( [1, 2], [0.5, 0] ),

This changes the size and opacity over time. The Tween object gets 2 arrays: time (in secs) and values. In this example the size changes from 2 (at sec 0) to 8 (after 1 sec). The opacity changes to 0.5 after 1 sec and fades away (opacity 0) after 2 secs.
 sizeTween    : new Tween( [0, 1, 2, 3], [1,2,3,4] ),

This will +1 the size evey second (for 3 seconds total).

colorTween   : new Tween( [0.4, 1], [ new THREE.Vector3(0,0,0.2), new THREE.Vector3(0, 0, 0.5) ] ),

This changes the color like above. The color is defined as a vector in HSL.
Example:
colorTween   : new Tween( [0.4, 1], [ new THREE.Vector3(0,1,0.5), new THREE.Vector3(0.2, 1, 0.5) ] ),


Angle/Rotation

      angleBase               : 0,
      angleSpread             : 720,
      angleVelocityBase       : 0,
      angleVelocitySpread     : 1000,

This defines a rotation (base+spread) of the texture and the rotation speed (base+spread).
Rotation within smoke is nice to have.

Mittwoch, 11. September 2013

Three.js - Particle Engine

Stemkoski made some nice effects with his particle engine. Let's see how we can use it in our own projects.

Setup

Include the ParticleEngine.js
<script src="three/ParticleEngine.js"></script>

If you get an error about scene is not defined, you have to change "var scene = .." into "scene = ..."!

To setup the engine use the following code:
       
 engine = new ParticleEngine();
 engine.setValues( settings );
 engine.initialize();

And add the engine.update() function to your render function.
    var render = function () {
       requestAnimationFrame(render);
       renderer.render(scene, camera);
       engine.update( 0.01 * 0.5 );
    };

Now we will define the settings, which will give us the different effects.

Let it rain

We use this code for some rain. Remember to get an image of a raindrop.
 

//rain
    var settings = {
      positionStyle    : Type.CUBE,
      positionBase     : new THREE.Vector3( 0, 0, 0 ),
      positionSpread   : new THREE.Vector3( 200, 200, 500 ),

      velocityStyle    : Type.CUBE,
      velocityBase     : new THREE.Vector3( 0, 0, -400 ),
      velocitySpread   : new THREE.Vector3( 10, 50, 10 ), 
      accelerationBase : new THREE.Vector3( 0, -10, 0 ),
      
      particleTexture : THREE.ImageUtils.loadTexture( 'images/raindrop2flip.png' ),

      sizeBase    : 4.0,
      sizeSpread  : 2.0,
      colorBase   : new THREE.Vector3(0.66, 1.0, 0.7), // H,S,L
      colorSpread : new THREE.Vector3(0.00, 0.0, 0.2),
      opacityBase : 0.6,

      particlesPerSecond : 3000,
      particleDeathAge   : 1.0,  
      emitterDeathAge    : 60
     };
    
        engine = new ParticleEngine();
 engine.setValues( settings );
 engine.initialize();

And we got some rain.

Customize settings

Let's dig up the settings to understand what is making the rain.

Position
positionStyle    : Type.CUBE,
positionBase     : new THREE.Vector3( 0, 0, 0 ),
positionSpread   : new THREE.Vector3( 20, 20, 20 ),

This defines the area, where the rain should be created. It's obviously a cube of 20x20x20, positioned in the center. See the picture below.


Velocity

velocityStyle    : Type.CUBE,
velocityBase     : new THREE.Vector3( 0, 0, -10 ),
velocitySpread   : new THREE.Vector3( 20, 0, 0 ),
accelerationBase : new THREE.Vector3( 0, 0, 0 ),

This describes the speed and the direction the drops are taking. The base defines the direction AND speed (by the distance). In this example the rain is slowly moving downwards. Notice the change of the axes, Z means -Y (downwards).
The spread defines the amount and direction of spreading. In this example the drops are not going downwards only, but have a little drift to the left and the right (X axis). See picture below.
The acceleration defines a point where all drops are accelerated to. Like wind effects.


Size
sizeBase    : 1.0,
sizeSpread  : 5.0,

The size of the drops and how the difference can be. Drops far away will still appear smaller.

Color
colorBase   : new THREE.Vector3(0.5, 1.0, 0.5), // H,S,L
colorSpread : new THREE.Vector3(0.60, 0.0, 0.3),
opacityBase : 0.6,

The color is in HSL (Hue, Saturation, Lightness). The spread defines again how the color can change randomly. Opacity is the transparency.

In this example we have a light blue (H=0.5), very colorfull (S=1) and pure (L=0.5) color.
The color can spread around, so we have a confetti like rain.

Amount / Time
particlesPerSecond : 1000,
particleDeathAge   : 1.0,
emitterDeathAge    : 5

Selfexplaining. Amount of particles created per second and how long they should exist. EmitterDeath defines the end of the particle animation.


Sample Code

<html>
<html>
 <head>
  <script src="three/build/three.min.js"></script>
  <script src="three/examples/js/controls/OrbitControls.js"></script>
  <script src="three/ParticleEngine.js"></script>
  <script src="jquery-1.10.2.min.js"></script>
    
  <script type="text/javascript">
     
   $(function() {
   
    //scene
    scene = new THREE.Scene();
    //camera
    var camera = new THREE.PerspectiveCamera( 45, window.innerWidth / window.innerHeight, 0.1, 1000 );
    camera.position.set(0,-13,5);
    camera.lookAt(new THREE.Vector3( 0, 5, 0 ));
    
    //renderer
    var renderer = new THREE.WebGLRenderer();
    renderer.setSize( window.innerWidth, window.innerHeight );

    //controls
    var controls = new THREE.OrbitControls( camera, renderer.domElement );
      
    //show canvas
    $("#canvas-container").html(renderer.domElement);
    
    
 //directional light
 var directionalLight = new THREE.DirectionalLight(0xffffff);
 directionalLight.position.set(6, 0, 6);
 scene.add(directionalLight);
 
    //plane
    var geometry = new THREE.PlaneGeometry(20, 20);
    var material = new THREE.MeshLambertMaterial( { color: 0x555555 } );
    var plane = new THREE.Mesh( geometry, material );
    scene.add(plane);
    
    
 //particle
    
    //rain
    var settings = {
      positionStyle    : Type.CUBE,
      positionBase     : new THREE.Vector3( 0, 0, 10 ),
      positionSpread   : new THREE.Vector3( 20, 20, 0 ),

      velocityStyle    : Type.CUBE,
      velocityBase     : new THREE.Vector3( 0, 0, -50 ),
      velocitySpread   : new THREE.Vector3( 5, 5, 0 ), 
      accelerationBase : new THREE.Vector3( 100, 0, 0 ),
      
      particleTexture : THREE.ImageUtils.loadTexture( 'images/raindrop2flip.png' ),

      sizeBase    : 0.4,
      sizeSpread  : 0.1,
      colorBase   : new THREE.Vector3(0.66, 1.0, 0.7), // H,S,L
      colorSpread : new THREE.Vector3(0.00, 0.0, 0.2),
      opacityBase : 0.6,

      particlesPerSecond : 5000,
      particleDeathAge   : 1.0,  
      emitterDeathAge    : 60
     };
    
        engine = new ParticleEngine();
 engine.setValues( settings );
 engine.initialize();


    //render scene
    var render = function () {
     requestAnimationFrame(render);
     renderer.render(scene, camera);
     
     engine.update( 0.01 * 0.5 );
    };
      
    render();


   });
     
  </script>
    
 </head>
 <body style="background: black">
    
  <div id="canvas-container" style="position: absolute; left:0px; top:0px"></div>
    
 </body>
</html>

Sonntag, 8. September 2013

Three.js - Heightmaps

Heightmaps are used for a rough terrain based on an image which gives us the desired heights. For adding a heightmap to a plane in three.js, 2 steps are required.

  • get data from an image
  • apply data to the vertices of the plane

Read data from image

This function returns an array with all the pixels of an image converted into a value. If the scale value is set to 1, you will get values from 1 (black) to 63,75 (white).
 
    //return array with height data from img
    function getHeightData(img,scale) {
     
     if (scale == undefined) scale=1;
     
        var canvas = document.createElement( 'canvas' );
        canvas.width = img.width;
        canvas.height = img.height;
        var context = canvas.getContext( '2d' );

        var size = img.width * img.height;
        var data = new Float32Array( size );

        context.drawImage(img,0,0);

        for ( var i = 0; i < size; i ++ ) {
            data[i] = 0
        }

        var imgd = context.getImageData(0, 0, img.width, img.height);
        var pix = imgd.data;

        var j=0;
        for (var i = 0; i<pix.length; i +=4) {
            var all = pix[i]+pix[i+1]+pix[i+2];
            data[j++] = all/(12*scale);
        }
        
        return data;
    }

Apply height data to plane

        // terrain
 var img = new Image();
 img.onload = function () {
  
     //get height data from img
     var data = getHeightData(img);
  
     // plane
     var geometry = new THREE.PlaneGeometry(10,10,9,9);
     var texture = THREE.ImageUtils.loadTexture( 'images/heightmap2.png' );
     var material = new THREE.MeshLambertMaterial( { map: texture } );
     plane = new THREE.Mesh( geometry, material );
     
     //set height of vertices
     for ( var i = 0; i<plane.geometry.vertices.length; i++ ) {
          plane.geometry.vertices[i].z = data[i];
     }

     scene.add(plane);
   
 };
 // load img source
 img.src = "images/heightmap2.png";

Example

I have a 10x10 plane with 100 vertices. My heightmap image is 10x10 px and looks like this:
Scaling the image data by 10 the result looks like this:

Important

The amount of vertices a plane has is (segmentsWidth+1) * (segmentsHeight+1).
If your image is 10x10 px it will give you 100 values. So you have to divide your plane into 9x9 segments.

For example this plane is divided into 5x5 segments, which results into 36 vertices.
var geometry = new THREE.PlaneGeometry(10,10,5,5);


Samstag, 7. September 2013

Three.js - Skybox

A skybox is a big cube in which our scene is placed inside. Our texture is drawn on the inside faces of the cube to create a sky.

Texture

The texture is divided into 6 parts, facing in all directions. Corresponding to the asex, we name them skybox-xpos.png (right), skybox-xnef.png (left), skybox-ypos.png (top), ....

This is the structure:

Creating the skybox

We first have to load all 6 textures into the material. Then we add the cube. It's as simple as that.
Keep in mind that the size of the skybox's cube has to fit into the camera's near/far viewpoint.
If the skybox is somehow rotated, you have to correct it (see example).


//skybox
 
 var imagePrefix = "images/skybox-";
 var directions  = ["xpos", "xneg", "ypos", "yneg", "zpos", "zneg"];
 var imageSuffix = ".png";
  
 var materialArray = [];
 for (var i = 0; i < 6; i++)
  materialArray.push( new THREE.MeshBasicMaterial({
   map: THREE.ImageUtils.loadTexture( imagePrefix + directions[i] + imageSuffix ),
   side: THREE.BackSide
  }));
 
 var skyGeometry = new THREE.CubeGeometry( 500, 500, 500 );
 var skyMaterial = new THREE.MeshFaceMaterial( materialArray );
 var skyBox = new THREE.Mesh( skyGeometry, skyMaterial );
 skyBox.rotation.x += Math.PI / 2;
 scene.add( skyBox );


Three.js - Shadows

Shadows are expensive. Thats why on default there is no shadow. For creating some shadows you need to set up a bunch of things so it works out.


  • tell the renderer that you want shadows
  • enable objects to cast shadows
  • enable objects to receive shadows
  • enable a light source to cast shadows (directional or spotlight only)

Renderer

ShadowMapEnable is required, shadowMapSoft is optional to soften the shadows.
    renderer.shadowMapEnabled = true;
    renderer.shadowMapSoft = true;

Objects

To enable objects to cast a shadow you have to set castShadow:
cylinder.castShadow = true;

To see a shadow on an object, the object has to receive the shadow.
plane.receiveShadow = true;

Light

To lights can create shadows: directional light and spotlight.

It's important to specify a box (orange cube) in which shadows are enabled via CameraNear, -Far, -Left, -Right, -Top, -Bottom. Keep it small for performance.

        //directional light
 var directionalLight = new THREE.DirectionalLight(0xffffff);
 directionalLight.position.set(5, 0, 5);
 directionalLight.target.position.set(0, 0, 0);
 
 directionalLight.castShadow = true;
 directionalLight.shadowDarkness = 0.5;
 
 directionalLight.shadowCameraNear = 0;
 directionalLight.shadowCameraFar = 15;
 
 directionalLight.shadowCameraLeft = -5;
 directionalLight.shadowCameraRight = 5;
 directionalLight.shadowCameraTop = 5;
 directionalLight.shadowCameraBottom = -5;
 
 scene.add(directionalLight);
        //spotlight
  var spotLight = new THREE.SpotLight( 0xffffff,1 );
  spotLight.position.set( 5,0,6 );
  
  spotLight.castShadow = true;
  
  spotLight.target.position.set(-1, 0, 1 );
  spotLight.shadowDarkness = 0.5;
  
  spotLight.shadowCameraNear = 6; 
  spotLight.shadowCameraFar = 13;
  
 scene.add( spotLight );

Debug help

To display the light's direction use this:
 spotLight.shadowCameraVisible = true;


Here is the complete code with both lights:

<html>
<html>
 <head>
  <script src="three/build/three.min.js"></script>
  <script src="three/examples/js/controls/OrbitControls.js"></script>
  <script src="jquery-1.10.2.min.js"></script>
    
  <script type="text/javascript">
     
   $(function() {
   
    //scene
    var scene = new THREE.Scene();
    //camera
    var camera = new THREE.PerspectiveCamera( 45, window.innerWidth / window.innerHeight, 0.1, 1000 );
    camera.position.set(0,-12,5);
    camera.lookAt(new THREE.Vector3( 0, 5, 0 ));
    
    //renderer
    var renderer = new THREE.WebGLRenderer();
    renderer.setSize( window.innerWidth, window.innerHeight );

    renderer.shadowMapEnabled = true;
    renderer.shadowMapSoft = true;

    //controls
    var controls = new THREE.OrbitControls( camera, renderer.domElement );
      
    //show canvas
    $("#canvas-container").html(renderer.domElement);
    
    //lights
    
 //directional light
 var directionalLight = new THREE.DirectionalLight(0xffffff);
 directionalLight.position.set(5, 0, 5);
 directionalLight.target.position.set(0, 0, 0);
 
 directionalLight.castShadow = true;
 directionalLight.shadowDarkness = 0.5;
 directionalLight.shadowCameraVisible = true;
 
 directionalLight.shadowCameraNear = 0;
 directionalLight.shadowCameraFar = 15;
 
 directionalLight.shadowCameraLeft = -5;
 directionalLight.shadowCameraRight = 5;
 directionalLight.shadowCameraTop = 5;
 directionalLight.shadowCameraBottom = -5;
 
 scene.add(directionalLight);

    
 //spotlight
  var spotLight = new THREE.SpotLight( 0xffffff,1 );
  spotLight.position.set( 5,0,6 );
  
  spotLight.castShadow = true;
  spotLight.shadowCameraVisible = true;
  
  spotLight.target.position.set(-1, 0, 1 );
  spotLight.shadowDarkness = 0.5;
  
  spotLight.shadowCameraNear = 6; 
  spotLight.shadowCameraFar = 13;
  
 scene.add( spotLight );


    //plane
    var geometry = new THREE.PlaneGeometry(20, 10);
    var material = new THREE.MeshPhongMaterial( { color: 0xcccccc } );
    var plane = new THREE.Mesh( geometry, material );
    plane.receiveShadow = true;
    scene.add(plane);
    
    
    //cube
    var geometry = new THREE.CubeGeometry(1,1,1);
    var material = new THREE.MeshLambertMaterial( { color: 0xffffff } );
    var cube = new THREE.Mesh( geometry, material );
    cube.position.set(-4,0,0.5);
    cube.castShadow = true;
    scene.add( cube );
    
         
  //cylinder
    var geometry = new THREE.CylinderGeometry(1, 0, 3, 50, 50, false);
    var material = new THREE.MeshLambertMaterial( { color: 0xffffff } );
    var cylinder = new THREE.Mesh( geometry, material );
    cylinder.position.set(-1,-2,1);
    cylinder.rotation.x = -Math.PI / 2;
    cylinder.castShadow = true;
    scene.add( cylinder );


    //render scene
    var render = function () {
     requestAnimationFrame(render);
     renderer.render(scene, camera);
    };
      
    render();
      
   });
     
  </script>
    
 </head>
 <body style="background: black">
    
  <div id="canvas-container" style="position: absolute; left:0px; top:0px"></div>
    
 </body>
</html>

Three.js - Lights

For light demonstration I will use a scene with different material. On the left there are objects with lambertMaterial, on the right with basicMaterial.


No light

Without a light source you can only see the basic material.

Ambient light

This adds an ambiental light, not to basicMaterial though.

    //subtle red ambient light
    var ambientLight = new THREE.AmbientLight(0x660000);
    scene.add(ambientLight);

Directional light

This adds a directional light (e.g. sun light) to the scene. A color and an intensity can be set. Optinal you can set the direction from where the light is coming by setting the position. In this example from the upper right. 

    //directional light
    var directionalLight = new THREE.DirectionalLight(0xffffff,1);
    directionalLight.position.set(1, 0, 1).normalize();
    scene.add(directionalLight);

Hemisphere light

Hemisphere light is similar to directional light, but you can add a sky color and a ground color to it.

    //hemisphere light
    var hemisphereLight = new THREE.HemisphereLight(0xffffff,0xff0000,1);
    hemisphereLight.position.set(1, 0, 1).normalize();
    scene.add(hemisphereLight);

Point light

Point light effects lambert and phong (left) materials. Color, intensity and distance can be set.

    var pointLight = new THREE.PointLight( 0xffffff,1 );
    pointLight.position.set( 0, 0, 3 );
    scene.add( pointLight );

Spot light

Is similar to PointLight but can cast shadows in one direction.

    var spotLight = new THREE.SpotLight( 0xffffff,1 );
    spotLight.position.set( 0, 0, 10 );
    scene.add( spotLight );

Three.js - Materials

There are different materials you can add to your objects. Some of them reqiure light, so don't forget to add some light to your scene.

Normal

var material = new THREE.MeshNormalMaterial();

Basic

The basic material is not effected by light or shadows.

var material = new THREE.MeshBasicMaterial({color: 0xff0000});

Lambert

This is a simple material wich is effected by light. A light source is required, such as point light or directional light.

var material = new THREE.MeshLambertMaterial({color: 0xffffff});

Phong

This material provides shininess.
    var material = new THREE.MeshPhongMaterial({
        // light
        specular: '#ffffff',
        // intermediate
        color: '#aaaaaa',
        // dark
        emissive: '#333333',
        shininess: 100 
      });

Texture

Keep in mind that texteres can look wierd on shaped objects like spheres. You have to make a "spherical projection" to change the image. It seems you have to host all images on your server.
var texture = THREE.ImageUtils.loadTexture( 'texture.jpg' );
 var material = new THREE.MeshLambertMaterial( { map: texture } );


Code

Here is the code of the examples.

<html>
<html>
 <head>
  <script src="three/build/three.min.js"></script>
  <script src="three/examples/js/controls/OrbitControls.js"></script>
  <script src="jquery-1.10.2.min.js"></script>
    
  <script type="text/javascript">
     
   $(function() {
   
    //scene
    var scene = new THREE.Scene();
    //camera
    var camera = new THREE.PerspectiveCamera( 45, window.innerWidth / window.innerHeight, 0.1, 1000 );
    camera.position.set(0,-12,5);
    camera.lookAt(new THREE.Vector3( 0, 5, 0 ));
    
    //renderer
    var renderer = new THREE.WebGLRenderer();
    renderer.setSize( window.innerWidth, window.innerHeight );
    
    //controls
    var controls = new THREE.OrbitControls( camera, renderer.domElement );
      
    //show canvas
    $("#canvas-container").html(renderer.domElement);
      
    
    //material for all geometries
    var material = new THREE.MeshNormalMaterial();
    
    //plane
    var geometry = new THREE.PlaneGeometry(10, 10);
    var plane = new THREE.Mesh( geometry, material );
    scene.add(plane);
   
    //cube
    var geometry = new THREE.CubeGeometry(1,1,1);
    var cube = new THREE.Mesh( geometry, material );
    cube.position.set(-3,0,0.5);
    scene.add( cube );
    
    
    //cylinder
    var geometry = new THREE.CylinderGeometry(1, 0.5, 2, 50, 50, false);
    var cylinder = new THREE.Mesh( geometry, material );
    cylinder.position.set(3,0,1);
    cylinder.rotation.x = -Math.PI / 2;
    scene.add( cylinder );

    //sphere
    var geometry = new THREE.SphereGeometry(1, 100, 100);
    var sphere = new THREE.Mesh( geometry, material );
    sphere.position.set(0,0,1);
    scene.add( sphere );


    //render scene
    var render = function () {
      requestAnimationFrame(render);
      renderer.render(scene, camera);
    };
      
    render();
      
   });
     
  </script>
    
 </head>
 <body style="background: black">
    
  <div id="canvas-container" style="position: absolute; left:0px; top:0px"></div>
    
 </body>
</html>

Three.js - Geometries

We have a set of different 3D objects we can place into our scene. For a better handling we are always using the same construct:

  • geometry: the object's geometry like cube, sphere, etc
  • material: the material/color, see materials
  • creating the object mit new TREE.Mesh()
  • positioning, rotation, etc
  • add object to scene

 
    //cube
    var geometry = new THREE.CubeGeometry(1,1,1);
    var material = new THREE.MeshNormalMaterial();
    var cube = new THREE.Mesh( geometry, material );
    cube.position.set(4,4,0.5)
    scene.add( cube );

Geometries

Plane

    //plane
    var geometry = new THREE.PlaneGeometry(10, 10)
    var material = new THREE.MeshBasicMaterial( { color: 0x666666 } );
    var plane = new THREE.Mesh( geometry, material );
    scene.add(plane);


Cube

    //cube
    var geometry = new THREE.CubeGeometry(1,1,1);
    var material = new THREE.MeshNormalMaterial();
    var cube = new THREE.Mesh( geometry, material );
    scene.add( cube );


Sphere

    //sphere
    //SphereGeometry(RADIUS,SEGMENTWIDTH,SEGMENTHEIGHT)
    var geometry = new THREE.SphereGeometry(1, 100, 100);
    var material = new THREE.MeshNormalMaterial();
    var sphere = new THREE.Mesh( geometry, material );
    scene.add( sphere );


Cylinder/Cone

    //cylinder
    //CylinderGeometry(BOTTOMRADIUS,TOPRADIUS,HEIGHT,SEGMENTRADIUS,SEGMENTHEIGHT,BUTTOM)
    var geometry = new THREE.CylinderGeometry(1, 0.5, 2, 50, 50, false)
    var material = new THREE.MeshNormalMaterial();
    var cylinder = new THREE.Mesh( geometry, material );
    cylinder.rotation.x = Math.PI / 2;
    scene.add( cylinder );


For more shapes check this out: http://stemkoski.github.io/Three.js/Shapes.html

Donnerstag, 5. September 2013

Three.js - Helpers

It is nice to have some HelperGrids and Vectors for your orientation in your scene. Here is how you can add some helpers.

Axes

Let's start with some simple axes in the center. The axes are X, Y and Z. The size in this example is 2.

    //axes
    var axes = new THREE.AxisHelper(2);
    scene.add(axes);

Grids

For a simple xz grid you can use GridHelper(SIZE, LINESPACE);
   
//grid xz
 var gridXZ = new THREE.GridHelper(10, 1);
 scene.add(gridXZ);


You can color the centerlines and lines, change the center and rotation for other grids.
   
//grid xz
 var gridXZ = new THREE.GridHelper(10, 1);
 gridXZ.position.set(10,0,10);
 scene.add(gridXZ);
 
 //grid xy
 var gridXY = new THREE.GridHelper(5, 1);
 gridXY.rotation.x = Math.PI/2;
 gridXY.position.set(5,5,0);
 gridXY.setColors( new THREE.Color(0xff0000), new THREE.Color(0xffffff) );
 scene.add(gridXY);
 
 //grid yz
 var gridYZ = new THREE.GridHelper(2, 0.5);
 gridYZ.position.set( 0,2,2 );
 gridYZ.rotation.z = Math.PI/2;
 gridYZ.setColors( new THREE.Color(0xffffff), new THREE.Color(0x00ff00) );
 scene.add(gridYZ);


Mittwoch, 4. September 2013

Three.js - Getting started

You recently discovered three.js and saw some awesome 3D games. Now you want do build something with three.js yourself. This tutorial might help you with it.


First setup

Luckily we don't need the whole package from mrdoob. The docs are very helpful, but to bring our project to life we just need the build/three.min.js. jQuery isn't requiered as well, but for this tutorials, it is.

Structure

Creating an index.html our structure looks like this:

Minimum index.html

You want to see a 3D scene already, so just copy this into your index.html and you should get your scene. Even if it won't look like 3D, it is.

<html>
<html>
 <head>
  <script src="three/build/three.min.js"></script>
  <script src="jquery-1.10.2.min.js"></script>
    
  <script type="text/javascript">
     
   $(function() {
   
    //scene
    var scene = new THREE.Scene();
    //camera
    var camera = new THREE.PerspectiveCamera( 75, window.innerWidth / window.innerHeight, 0.1, 1000 );
    camera.position.z = 5;
    //renderer
    var renderer = new THREE.WebGLRenderer();
    renderer.setSize( window.innerWidth, window.innerHeight );
    
      
    //show canvas
    $("#canvas-container").html(renderer.domElement);
      
   
    //cube
    var geometry = new THREE.CubeGeometry(1,1,1);
    var material = new THREE.MeshBasicMaterial( { color: 0x0000ff } );
    var cube = new THREE.Mesh( geometry, material );
    scene.add( cube );
      
         
    //render scene
    var render = function () {
     requestAnimationFrame(render);
     renderer.render(scene, camera);
    };
      
    render();
      
   });
     
  </script>
    
 </head>
 <body style="background: black">
    
  <div id="canvas-container" style="position: absolute; left:0px; top:0px"></div>
    
 </body>
</html>

First Scene

If WebGL is supported, we get a blue square. Actually it is a blue cube, seen from the back!


What we need

We skipped the explanation, so here it's how it works.
  • A scene which contains all the objects we want to see.
  • A camera so we have a view on the scene.
  • A renderer who draws the scene. The render() is called periodically, so changes on the scene will be redrawn "immediately"

Camera Controls for Starters

For starters it is nice to move the camera via mouse control. There is a plugin OrbitControls.js which will do the job. I will keep the folder structure so you can find it easily in your three.js package.

To use it we need to include the OrbitControls.js and create the controls.

  <script src="three/examples/js/controls/OrbitControls.js"></script>
  
   
    //controls
    var controls = new THREE.OrbitControls( camera, renderer.domElement );
  

Here the whole script:
<html>
<html>
 <head>
  <script src="three/build/three.min.js"></script>
  <script src="three/examples/js/controls/OrbitControls.js"></script>
  <script src="jquery-1.10.2.min.js"></script>
    
  <script type="text/javascript">
     
   $(function() {
   
    //scene
    var scene = new THREE.Scene();
    //camera
    var camera = new THREE.PerspectiveCamera( 75, window.innerWidth / window.innerHeight, 0.1, 1000 );
    camera.position.z = 5;
    //renderer
    var renderer = new THREE.WebGLRenderer();
    renderer.setSize( window.innerWidth, window.innerHeight );
    //controls
    var controls = new THREE.OrbitControls( camera, renderer.domElement );
      
    //show canvas
    $("#canvas-container").html(renderer.domElement);
      
   
    //cube
    var geometry = new THREE.CubeGeometry(1,1,1);
    var material = new THREE.MeshBasicMaterial( { color: 0x0000ff } );
    var cube = new THREE.Mesh( geometry, material );
    scene.add( cube );
      
         
    //render scene
    var render = function () {
     requestAnimationFrame(render);
     renderer.render(scene, camera);
    };
      
    render();
      
   });
     
  </script>
    
 </head>
 <body style="background: black">
    
  <div id="canvas-container" style="position: absolute; left:0px; top:0px"></div>
    
 </body>
</html>